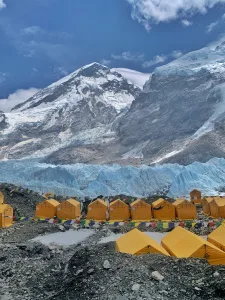
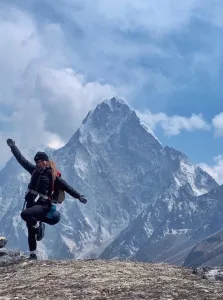
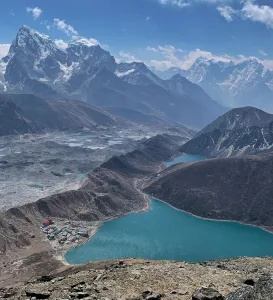
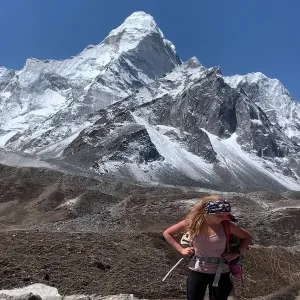
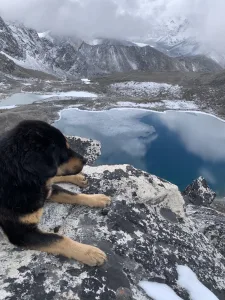
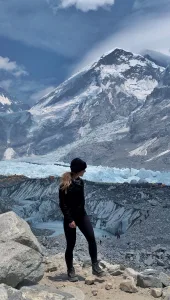
The Three Passes Trek is the ultimate adventure in the Everest region, perfect for those seeking a more challenging and comprehensive experience beyond the traditional Everest Base Camp trek. Crossing three high mountain passes—Kongma La (5,535 meters), Cho La (5,420 meters), and Renjo La (5,360 meters), it offers trekkers panoramic views of some of the world’s highest peaks such as Everest, Lhotse, Makalu, and Cho Oyu. The journey begins in Lukla, weaving through remote Sherpa villages, lush valleys, and rugged alpine terrain, and includes highlights like Gokyo Lakes, Gokyo Ri, Kala Patthar, and Everest Base Camp.
I wrote a post about my experience solo on the Three Passes Trek, if you want a detailed breakdown of each day.
- Why choose the Three Passes trek over the Everest Base Camp trek?
- What are the highlights of the Three Passes trek?
- What does a Three Passes Trek itinerary look like?
- How long does the Three Passes trek typically take to complete?
- I don’t have time for the full Three Passes Trek. Are there any additions to the Everest Base Camp trek you recommend?
- How much does the Three Passes Trek cost?
- Is it easy to find trekking partners?
- Should I trek from east to west or west to east?
- What kind of food can I expect at teahouses?
- What should I wear?
- How cold does it get?
- How to book teahouses?
- When is the best time for the Three Passes Trek?
- What permits do I need? Didn’t Nepal ban solo trekking?
- Is it safe to trek solo?
- How can I avoid altitude sickness?
- What should I bring?
Why choose the Three Passes trek over the Everest Base Camp trek?
Scenic variety
The Three Passes Trek combines the highlights of the traditional EBC trek with additional high-altitude challenges and scenic rewards, making it a more fulfilling and enriching trek. Each of the three passes—Kongma La, Cho La, and Renjo La—provides a unique vantage point and stunning landscapes, without the crowds of the EBC route. The Three Passes Trek also offers a more diverse and panoramic view of the Everest region, including vistas of Lhotse, Nuptse, Ama Dablam, Cho Oyu, and Makalu that you wouldn’t see on the EBC trek.
Greater challenge
The Three Passes Trek is more physically demanding due to the high-altitude passes (each over 5,000m), making it ideal for those seeking a greater challenge and sense of accomplishment.
Fewer crowds
The Three Passes Trek is less popular than the traditional EBC trek, which means fewer trekkers on the trail and at the teahouses. This allows for a more immersive experience, where you can enjoy the tranquility and raw beauty of the Himalayas.
Circular route
Unlike the traditional EBC trek, which is an out-and-back route, the Three Passes Trek forms a loop, allowing you to experience new scenery throughout the journey.
Choosing the Three Passes Trek over the traditional EBC trek means opting for a more challenging, varied, and immersive adventure, perfect for trekkers looking to push their limits and fully experience the grandeur of the Himalayas.
What are the highlights of the Three Passes trek?
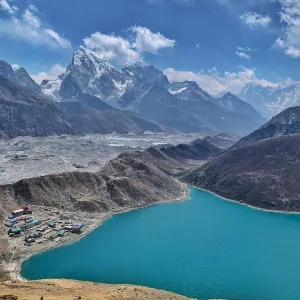
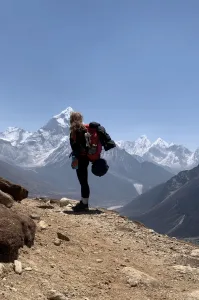
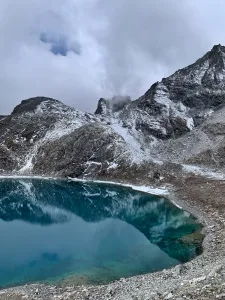
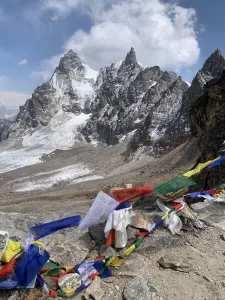
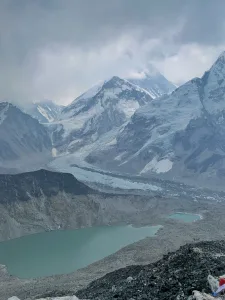
Renjo La Pass: Renjo La Pass, sitting at 5,360 meters (17,585 feet), provides a breathtaking vista of Everest, Lhotse, and other towering peaks along with the turquoise lakes of Gokyo. Crossing Renjo La is a challenging yet rewarding experience, giving trekkers a sense of accomplishment as they descend into the beautiful Gokyo Valley.
Cho La Pass: Cho La Pass, at an altitude of 5,420 meters (17,782 feet), is a technical and demanding part of the Three Passes trek. The pass connects the Gokyo Valley with the Khumbu Valley and involves a trek across a glacier, making it an adventurous crossing. The views from Cho La encompass a dramatic landscape of snowy peaks and rugged terrain, where you get clear views of Ama Dablam, known as one of the most beautiful mountains in the world, and Cholatse.
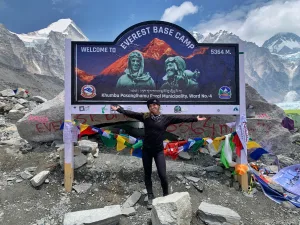
Everest Base Camp: Everest Base Camp, located at 5,364 meters (17,598 feet), is the launching point for climbers aiming to summit Mount Everest. For trekkers, reaching Base Camp is a significant achievement, offering a close-up view of the Khumbu Icefall and the surrounding peaks. The site is steeped in mountaineering history and provides a unique atmosphere filled with the spirit of adventure.
Gokyo Ri: Gokyo Ri, standing at 5,357 meters (17,575 feet), is a popular viewpoint offering one of the best panoramas in the Everest region. The ascent to Gokyo Ri is steep but short, with stunning views of Everest, Lhotse, Makalu, and Cho Oyu. The vantage point also overlooks the serene Gokyo Lakes and the expansive Ngozumpa Glacier, the largest glacier in the Himalayas.
Kala Patthar: Kala Patthar, at 5,545 meters (18,192 feet), is renowned for providing the most accessible close-up view of Mount Everest. Trekkers often climb Kala Patthar for sunrise or sunset to witness the breathtaking sight of Everest bathed in golden light. The summit offers 360-degree views of Everest, Nuptse, Pumori, and other surrounding peaks, making it a highlight of the trek.
Kongma La Pass: Kongma La Pass, standing at an altitude of 5,535 meters (18,159 feet), is the highest and one of the most challenging of the three passes on the Three Passes Trek. The ascent is steep and demanding, but the reward is a panoramic view of the Khumbu region, including majestic peaks like Ama Dablam, Makalu, and Lhotse. Crossing Kongma La offers trekkers a sense of accomplishment and a deeper connection to the rugged beauty of the Himalayas. The pass also provides a thrilling descent into the Imja Valley, leading towards Chukhung and the continuation of the journey to Everest Base Camp.
What does a Three Passes Trek itinerary look like?
There is a lot of flexibility allowed on the Three Passes Trek. You can add acclimatization days, or join together two shorter days if you are limited on time. For more details on how I structured my trek, I share the daily breakdown, distances, and photos in my post here.
Day 1: Lukla to Phakding
- Distance: 8 km (5 miles)
- Max Elevation: 2,800 m (9,186 ft)
- Time: 3-4 hours
Day 2: Phakding to Namche Bazaar
- Distance: 10-12 km (6.2-7.5 miles)
- Max Elevation: 3,440 m (11,286 ft)
- Time: 5-6 hours
Day 3: Acclimatization Day in Namche Bazaar
- Distance: Short hike (optional)
- Max Elevation: 3,880 m (12,730 ft) (Everest View Hotel)
- Time: 3-4 hours
Day 4: Namche Bazaar to Thame
- Distance: 10 km (6.2 miles)
- Max Elevation: 3,820 m (12,533 ft)
- Time: 4-5 hours
Day 5: Thame to Lungden
- Distance: 9 km (5.6 miles)
- Max Elevation: 4,380 m (14,370 ft)
- Time: 5-6 hours
Day 6: Lungden to Gokyo via Renjo La Pass
- Distance: 16 km (10 miles)
- Max Elevation: 5,360 m (17,585 ft) (Renjo La Pass)
- Time: 8-9 hours
Day 7: Gokyo Ri
- Distance: 4 km (2.5 miles)
- Max Elevation: 5,357 m (17,575 ft) (Gokyo Ri)
- Time: 3-4 hours
Day 8: Gokyo to Thagnak
- Distance: 7 km (4.3 miles)
- Max Elevation: 4,790 m (15,715 ft)
- Time: 3-4 hours
Day 9: Thagnak to Dzongla via Cho La Pass
- Distance: 13 km (8 miles)
- Max Elevation: 5,420 m (17,782 ft) (Cho La Pass)
- Time: 7-8 hours
Day 10: Dzongla to Lobuche
- Distance: 6 km (3.7 miles)
- Max Elevation: 4,940 m (16,207 ft)
- Time: 3-4 hours
Day 11: Everest Base Camp: Lobuche to Gorak Shep to Everest Base Camp, and back to Gorak Shep
- Distance: 15 km (9.3 miles) (round trip)
- Max Elevation: 5,364 m (17,598 ft) (Everest Base Camp)
- Time: 7-8 hours
Day 12: Gorak Shep to Kala Patthar to Lobuche
- Distance: 12 km (7.5 miles)
- Max Elevation: 5,545 m (18,192 ft) (Kala Patthar)
- Time: 7-8 hours
Day 13: Lobuche to Chukhung via Kongma La Pass
- Distance: 12 km (7.5 miles)
- Max Elevation: 5,535 m (18,159 ft) (Kongma La Pass)
- Time: 8-10 hours
Day 14: Chukhung to Dingboche
- Distance: 5 km (3.1 miles)
- Max Elevation: 4,730 m (15,518 ft)
- Time: 3-4 hours
Day 15: Dingboche to Tengboche
- Distance: 11 km (6.8 miles)
- Max Elevation: 4,360 m (14,304 ft)
- Time: 5-6 hours
Day 16: Tengboche to Namche Bazaar
- Distance: 10 km (6.2 miles)
- Max Elevation: 3,870 m (12,697 ft)
- Time: 5-6 hours
Day 17: Namche Bazaar to Lukla
- Distance: 19 km (11.8 miles)
- Max Elevation: 3,440 m (11,286 ft)
- Time: 7-8 hours
How long does the Three Passes trek typically take to complete?
The complete Three Passes trek usually takes around 16-21 days. This includes trekking over Renjo La, Cho La, and Kongma La passes, exploring Everest Base Camp, and allowing time for acclimatization.
I don’t have time for the full Three Passes Trek. Are there any additions to the Everest Base Camp trek you recommend?
My favorite parts of the trek were Gokyo Ri/Gokyo Lakes and Kongma La Pass.

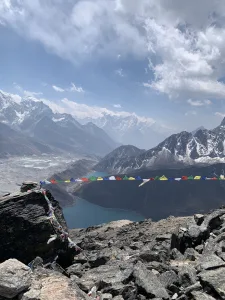
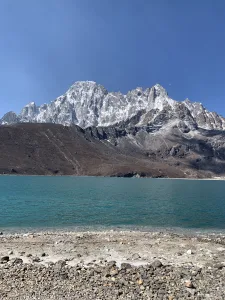
Gokyo Ri and Cho La Pass
You can do Gokyo Ri and Cho La Pass by taking a detour for three days (Namche to Gokyo instead of Namche to Lobuche) and using an extra two days:
- Trek Namche to Dole: After reaching Namche Bazaar, take a side trip to the Gokyo Valley by trekking to Dole.
- Trek to Machhermo: Trek Dole to Machhermo.
- Trek to Gokyo, ascend Gokyo Ri: Spend the morning trekking to Gokyo. In the afternoon, hike up to Gokyo Ri for panoramic views of Everest, Cho Oyu, and the Gokyo Lakes.
- Trek Gokyo to Thangnak: Trek from Gokyo to Thangnak, which will serve as your base for crossing Cho La Pass.
- Cho La Pass to Lobuche: Start early to cross the Cho La Pass (5,420 meters / 17,782 feet). After crossing the pass, continue past Dzongla and trek directly to Lobuche.
- Lobuche to Gorak Shep and Everest Base Camp: Proceed with the original EBC route: trek from Lobuche to Gorak Shep, visit EBC, and then stay in Gorak Shep for the night.

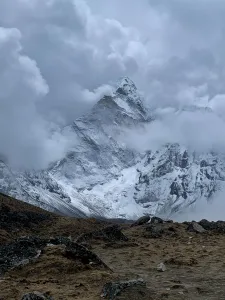

Kongma La Pass
Adding Kongma La Pass to the traditional Everest Base Camp (EBC) trek adds two more days:
- Trek to Chukhung: Follow the traditional EBC route to Dingboche, then trek to Chukhung.
- Cross Kongma La Pass: From Chukhung, cross the high-altitude Kongma La Pass to reach Lobuche, where you will continue on the EBC route on day 3.
- Lobuche to Gorak Shep and Everest Base Camp: Proceed with the original EBC route: trek from Lobuche to Gorak Shep, visit EBC, and then stay in Gorak Shep for the night.
Lobuche East
Note that this plan would replace the 3 days you would take to go from Namche Bazaar to Tengboche, Tengboche to Dingboche, and Dingboche to Lobuche.
To add the Lobuche East summit to the traditional Everest Base Camp (EBC) trek:
- Trek to Lobuche: Follow the traditional route to Lobuche.
- Head to Lobuche East High Camp: From Lobuche, begin trekking to the High Camp for your overnight stay.
- Summit Lobuche East: Spend a day climbing Lobuche East (6,119 meters / 20,075 feet) and return to Lobuche.
- Rejoin EBC Trek: The day after the climb, continue to Gorak Shep and visit Everest Base Camp.
This extension adds about 2-3 days to the trek, providing a climbing experience and panoramic summit views.
How much does the Three Passes Trek cost?
If you do everything solo, without a guide or porter, it can be quite budget friendly. Here’s a breakdown of costs:
| Item | Cost (USD) | Total cost (USD) |
|---|---|---|
| Flights Kathmandu to Lukla | $200 one way | $400 |
| Twin Room with shared bathroom | $3-8 a night | $94 |
| 3 meals | $25 a day | $425 |
| WiFi | $3-5 a day | $68 |
| Phone charge | $3-5 a day | $68 |
| Powerbank charge | $6-8 a day | $119 |
| Hot shower | $5-8 a day | $59 |
Assuming a 17 day trek where you charge your phone daily and take a hot shower every other day, the total cost would be around $1200 USD. The cost will vary greatly depending how much you eat and drink, how often you charge your devices and purchase WiFi, and how often you want to have a hot shower. Since ATMs are limited on the trail, I recommend you err on the side of caution and bring more money than you think you’ll need.
Is it easy to find trekking partners?
It is possible to find trekking partners, but note the Three Passes Trek is not as popular as the Everest Base Camp Trek. If you want to find other people to hike with, you can try finding someone through social media before you arrive in Nepal. Try Reddit (r/trekkingNepal) and Facebook groups such as “Trekking Partners Nepal” or “Nepal Backpackers”. Once in Nepal, ask around at your hostel or guesthouse. You may also have some luck on the trail, meeting other trekkers at teahouses or at viewpoints.
Should I trek from east to west or west to east?
The typical direction for the Three Passes trek is east to west, crossing Renjo La Pass, Cho La Pass, Everest Base Camp, and finally Kongma La Pass. This direction is favored for better acclimatization, with more subtle altitude changes than the west to east direction. It also allows you to tackle the passes in the most efficient order, and take on the hardest pass (Kongma La) once you are already acclimatized.
What kind of food can I expect at teahouses?
While trekking to Everest Base Camp and the Three Passes, you’ll find traditional Nepali food and some international dishes. Common Nepali meals include:
- Dal Bhat: A staple Nepali meal consisting of rice, lentil soup, and vegetable curry. It is often served bottomless, making it one of the best price to food quantity ratios for hungry trekkers.
- Momo: Nepalese dumplings filled with vegetables, chicken, or buffalo meat.
- Thukpa: A Tibetan noodle soup with vegetables and sometimes meat.
For breakfast, pancakes, omelets, eggs, and toast are standard. For lunch/dinner, you can often find pasta, sandwiches, pizza, and a variety of soups. You can often find biscuits, nuts, and chocolate bars at teahouses as well, and some villages have small shops where you can stock up on more snacks including chips, energy bars, and candies.
What should I wear?
Bring layers for a variety of different weather conditions, but not so many options that you add too much weight to your pack. I’d recommend the following:
- Base Layers: Moisture-wicking tops and bottoms.
- Insulating Layers: Fleece sweater and down jacket for warmth.
- Outer Layers: Waterproof and windproof jacket and pants.
- Hat and Gloves: Warm hat and gloves for cold temperatures.
- Footwear: Sturdy, waterproof trekking boots and several pairs of moisture-wicking socks.
- Accessories: Sunglasses, buff or neck gaiter, and a good quality backpack.
I consider a neck gaiter to be essential. Wearing it over your mouth can help warm the cold air before you breathe it in, which is believed to reduce your chances of getting the Khumbu Cough. There is also significant pollution and dust particles from the animals that can be floating around in the air, especially from Namche to Lukla.
How cold does it get?
During the day, it can range from -10°C to 20°C (15°F to 70°F) depending on the altitude and weather conditions. At night, it can drop to -15°C to -20°C (5°F to -4°F) or even lower at higher altitudes.
When you’re at altitude, you are exposed to more intense sunlight and a higher concentration of UV radiation. While hiking, at one point I felt hot in a tank top and leggings, but the temperature was -10°C. It was the intensity of the sun that made me feel warm (and my Canadian blood, no doubt. Full disclosure, I always wore less layers than other trekkers).
How to book teahouses?
Teahouses can be booked in advance or upon arrival. Booking on arrival is the cheapest and most flexible way to plan your trek, allowing you to add/change/remove stops depending how you feel that day. However, during peak season you may find that teahouses are booked up.
You may want to book your first night or two, and then have those teahouses call to book your accommodation for the next day.
If you prefer to book everything in advance, you can use a service like HoneyGuide to book everything for you. Moving the dates by 1-2 days is usually accommodated, and can be done via WhatsApp. This is convenient and provides some peace of mind, but note that the price will be higher than booking on arrival.
When is the best time for the Three Passes Trek?
The best times to trek are spring, from March to May, and autumn, from September to November. In the winter, ice and snow make the passes unsafe, and the cold temperatures bring an additional challenge. In the summer, monsoon season can cause flooding and landslides, making trails unpassable.
What permits do I need? Didn’t Nepal ban solo trekking?
Solo trekkers need the following permits:
- TIMS (Trekkers’ Information Management System) Card: Required for all trekkers.
- Sagarmatha National Park Entry Permit: Needed to enter the national park where Everest Base Camp is located.
- Local Area Permit: Khumbu Pasang Lhamu Rural Municipality Permit, available at the entry point in Monjo.
While Nepal did ban solo trekking, Sagarmatha National Park (Everest Region) does not abide by the new regulation. This means that you still can trek solo for the Three Passes Trek and Everest Base Camp.
Is it safe to trek solo?
Yes, but follow best practices for hiking solo. It’s always a good idea to bring a satellite phone and first aid kit whenever you hike. Bring navigation tools and be prepared to navigate through whiteouts. Ensure you are in good physical shape and take adequate time to acclimatize to increase your chances of having an enjoyable time on the trail. Lastly, keep updated on weather conditions and trail information.
How can I avoid altitude sickness?
To avoid altitude sickness, it’s important to ascend gradually, take rest days, and stay hydrated. A good rule of thumb is to not ascend more than 500 meters (1,640 feet) per day above 3,000 meters (9,840 feet). To stay hydrated, drinking lots of water is essential but avoiding alcohol is also a good idea.
What should I bring?
Essential gear includes:
- Map and compass/GPS: For navigation.
- Water purification: Tablets or a filtration system.
- Altitude pills: It’s best to do everything within your control avoid altitude sickness.
- Portable charger: The cold can drain phone battery, so this is useful if you want to use your phone for photos and navigation.
I’d also recommend the following:
- Headlamp: For sunrise hikes.
- Kindle: Read when hanging out at lodges without the extra weight of books.
- Sleeping bag: To stay warm in the teahouses. Whether or not to bring a sleeping bag is a personal choice – I know a few people who were fine without, and just wore their jackets to bed and requested extra blankets. I had a sleeping bag rated to -20°C (-4°F) for when I climbed Lobuche Peak, and I was glad I had it for a few days at higher altitudes.
- Trekking poles: Remove some pressure off your knees.
- Snacks: You may want some of your favorite snacks for when the trek gets challenging. Snacks are available on the route, but the cost is higher and the selection is limited.
Any other questions? Let me know in the comments!

Pingback: Three Passes Trek: My Experience Solo Trekking in Nepal